Mastering Image Resizing in FireAlpaca: A Comprehensive Guide
Related Articles: Mastering Image Resizing in FireAlpaca: A Comprehensive Guide
Introduction
With enthusiasm, let’s navigate through the intriguing topic related to Mastering Image Resizing in FireAlpaca: A Comprehensive Guide. Let’s weave interesting information and offer fresh perspectives to the readers.
Table of Content
- 1 Related Articles: Mastering Image Resizing in FireAlpaca: A Comprehensive Guide
- 2 Introduction
- 3 Mastering Image Resizing in FireAlpaca: A Comprehensive Guide
- 3.1 Understanding the Significance of Resizing
- 3.2 Resizing Methods in FireAlpaca
- 3.3 Tips for Successful Image Resizing
- 3.4 Frequently Asked Questions
- 3.5 Conclusion
- 4 Closure
Mastering Image Resizing in FireAlpaca: A Comprehensive Guide
FireAlpaca, a versatile and free digital painting software, offers a range of tools for artists, including the ability to resize images. This capability is crucial for various creative endeavors, from preparing artwork for online platforms to adapting images for different printing formats.
This guide provides a detailed explanation of how to resize images in FireAlpaca, covering essential techniques and considerations. We will explore the importance of image resolution and aspect ratio, discuss the various resizing methods available, and offer tips for achieving optimal results.
Understanding the Significance of Resizing
Resizing images in FireAlpaca is not merely a cosmetic alteration; it involves manipulating the image’s dimensions and resolution, directly impacting its quality and suitability for different purposes.
Resolution: Image resolution refers to the number of pixels that make up the image. Higher resolution images contain more pixels, resulting in greater detail and clarity. Resizing an image can affect its resolution, potentially leading to pixelation or blurring if not done correctly.
Aspect Ratio: The aspect ratio describes the relationship between an image’s width and height. Maintaining the correct aspect ratio is crucial for preserving the image’s proportions and avoiding distortion.
Resizing Methods in FireAlpaca
FireAlpaca offers two primary methods for resizing images:
-
Using the "Image" Menu: This method provides a straightforward way to resize an image while maintaining its aspect ratio or adjusting it as needed.
- Open the image: Start by opening the image you wish to resize in FireAlpaca.
- Access the "Image" menu: Navigate to the "Image" menu located at the top of the FireAlpaca interface.
- Select "Resize": Click on "Resize" from the dropdown menu.
- Adjust dimensions: A dialog box will appear, displaying the image’s current dimensions. Enter the desired width and height values, ensuring they are in pixels.
- Maintain aspect ratio: Check the "Maintain aspect ratio" box if you want to preserve the original proportions of the image.
-
Choose interpolation method: Select the appropriate interpolation method from the dropdown menu. This determines how pixels are added or removed during resizing.
- Nearest Neighbor: This method is the fastest but can result in pixelation.
- Bilinear: This method provides smoother results than Nearest Neighbor but may lead to some blurring.
- Bicubic: This method offers the most detail and smoothness but can be computationally intensive.
- Confirm resizing: Click "OK" to apply the changes and resize the image.
-
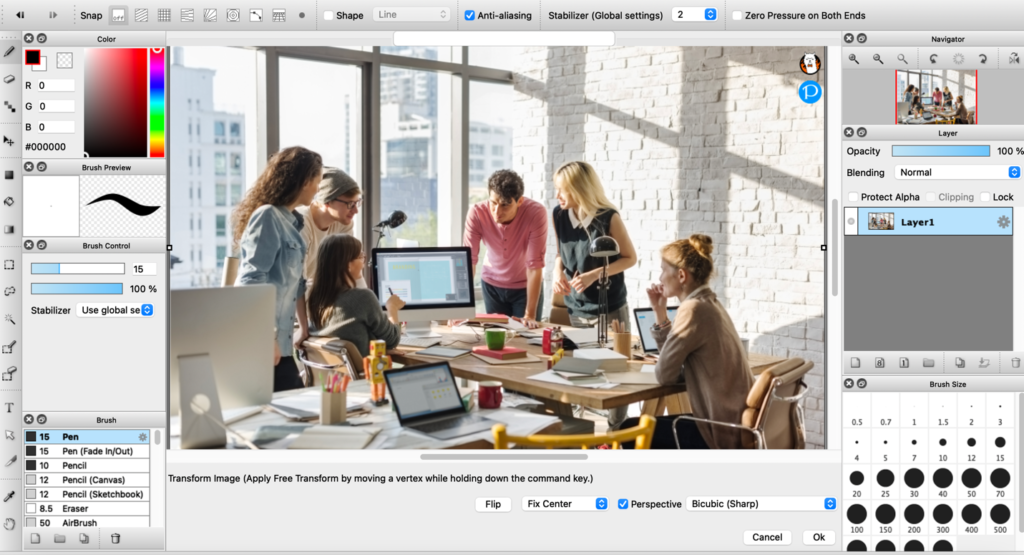
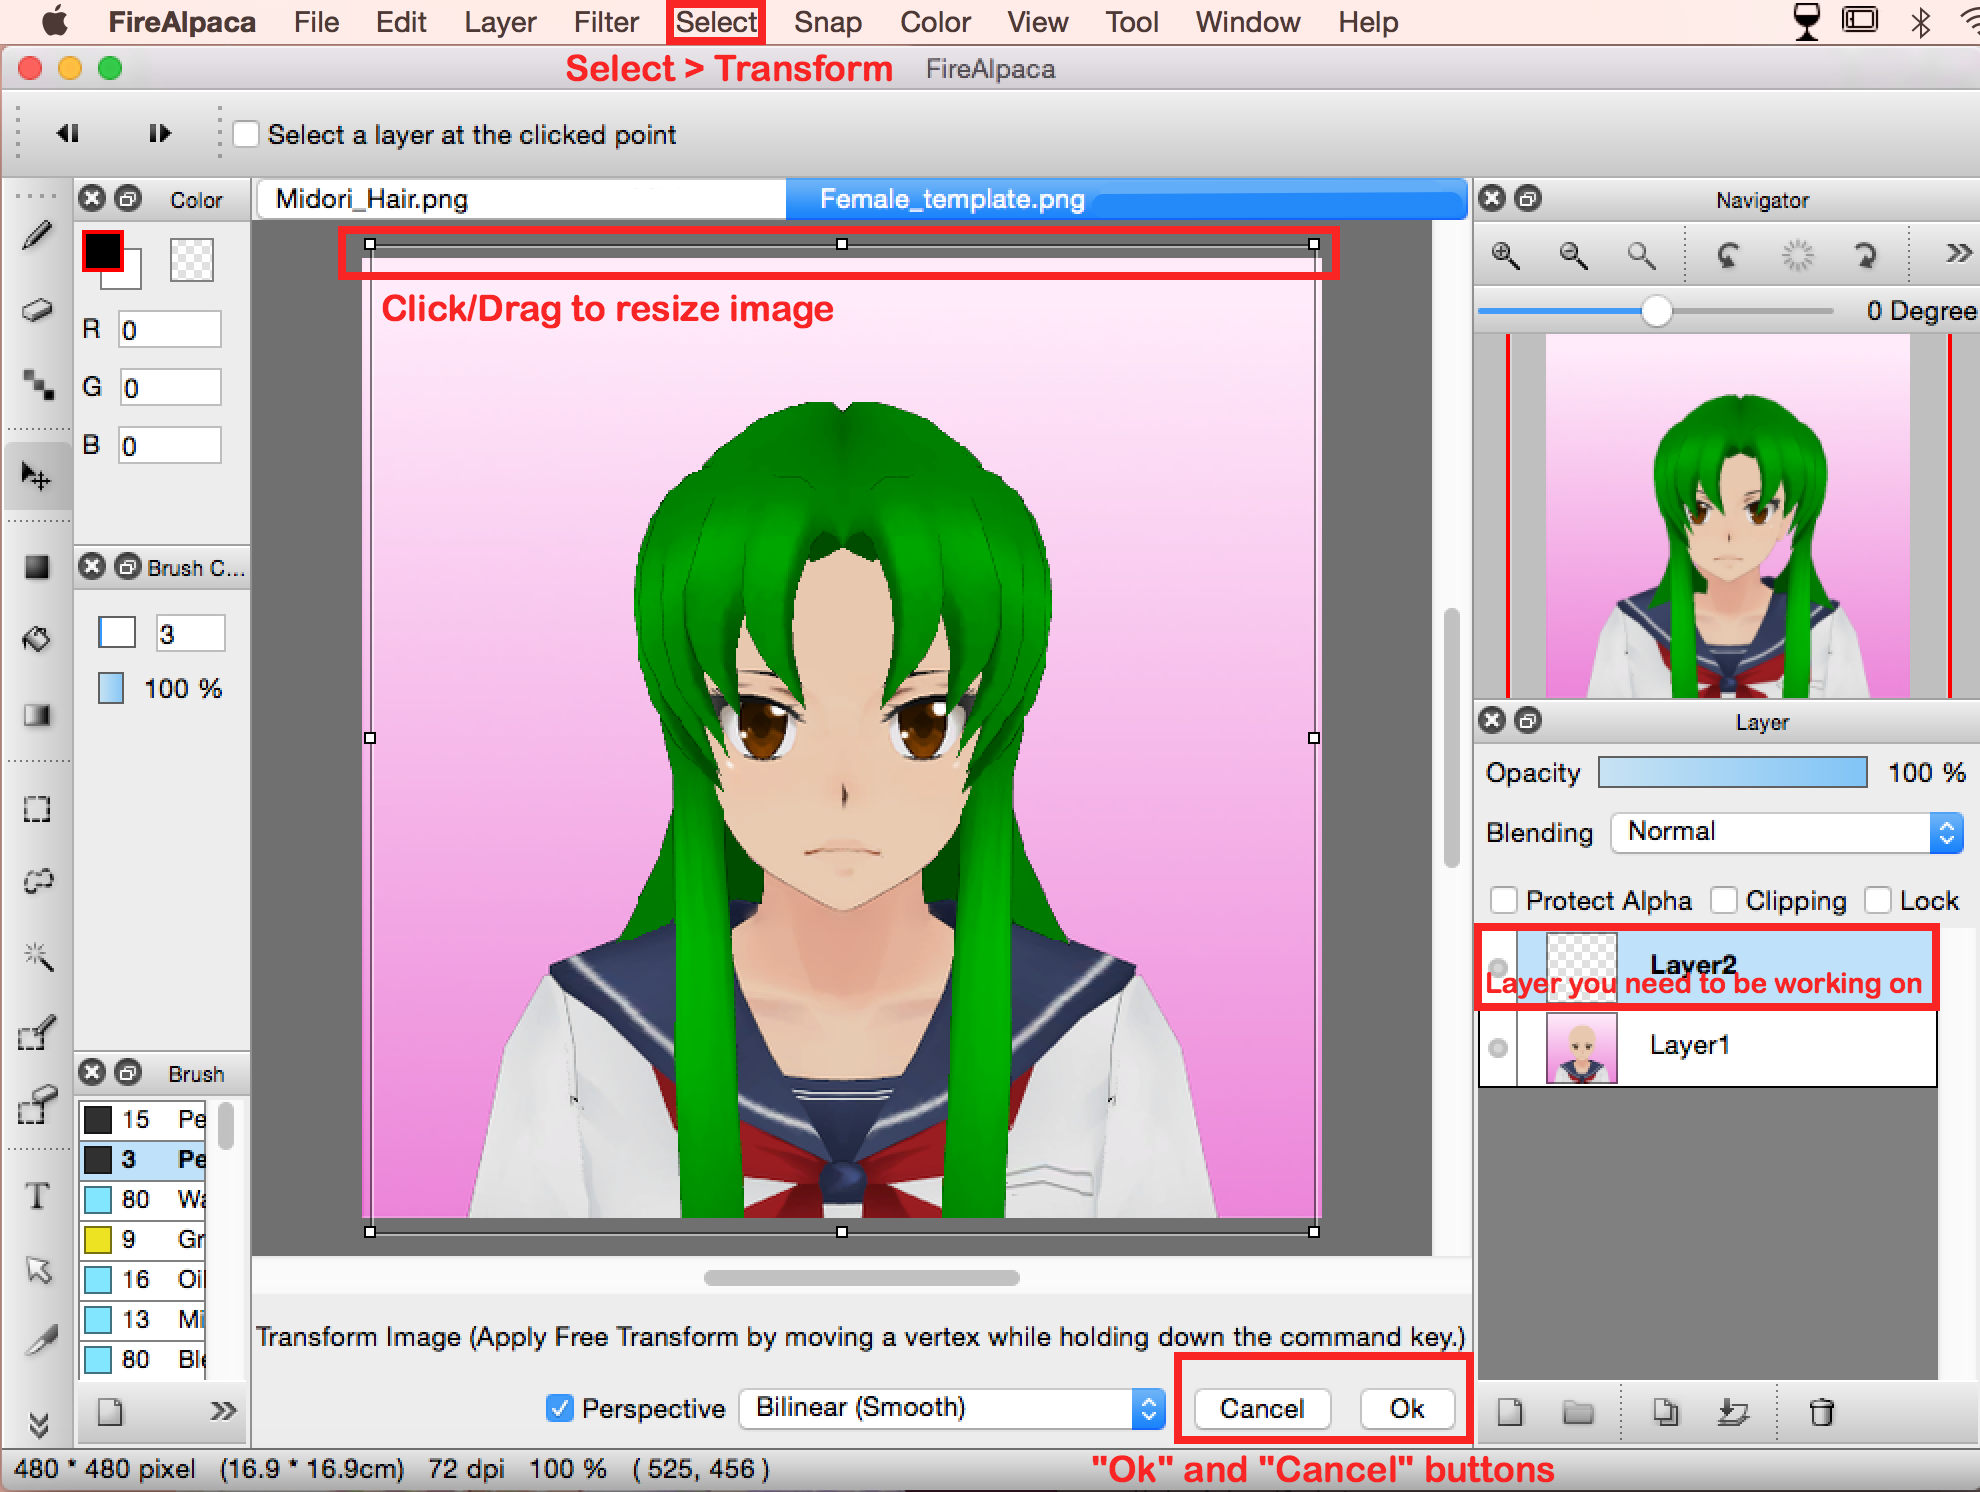
Using the "Transform" Tool: The "Transform" tool provides a more interactive and precise way to resize an image. It allows for adjustments to the image’s size, rotation, and perspective.
- Select the "Transform" tool: Locate the "Transform" tool in the toolbar. It is typically represented by a curved arrow.
- Click on the image: Click anywhere on the image to activate the Transform tool.
- Resize the image: Hover your cursor over the edges or corners of the image. A resize handle will appear, allowing you to drag and adjust the image’s dimensions.
- Maintain aspect ratio: Hold down the Shift key while resizing to maintain the original aspect ratio.
- Confirm changes: Click outside the image area to apply the transformations.
Tips for Successful Image Resizing
- Understand the purpose: Before resizing, consider the intended use of the image. If it is for online use, a smaller size may be sufficient. For printing, a higher resolution is generally required.
- Experiment with interpolation methods: Different interpolation methods produce varying results. Experiment with different options to find the best one for your specific image and resizing needs.
- Save multiple versions: When resizing, it is always a good idea to save multiple versions of the image. This allows you to easily revert to the original or compare different resizing results.
- Use non-destructive editing: When possible, use non-destructive editing techniques, such as layers, to resize the image without permanently altering the original pixels. This allows for greater flexibility and control.
Frequently Asked Questions
Q: What is the best interpolation method for resizing images?
A: The best interpolation method depends on the specific image and the desired outcome. Bicubic interpolation generally produces the most detail and smoothness but can be computationally intensive. Bilinear interpolation offers a balance between speed and quality. Nearest Neighbor is the fastest but can result in pixelation.
Q: Can I resize an image without losing quality?
A: It is generally not possible to resize an image without some loss of quality, especially when scaling up. However, by using appropriate interpolation methods and carefully choosing the resizing parameters, you can minimize quality loss.
Q: How can I maintain the aspect ratio of an image when resizing?
A: In FireAlpaca, you can maintain the aspect ratio by checking the "Maintain aspect ratio" box in the "Resize" dialog or by holding down the Shift key while using the "Transform" tool.
Q: What happens if I resize an image too small?
A: Resizing an image too small can lead to significant pixelation and loss of detail. It is important to consider the intended use of the image and choose a size that is appropriate for the purpose.
Conclusion
Resizing images in FireAlpaca is a fundamental skill for any digital artist or image editor. By understanding the concepts of resolution and aspect ratio and utilizing the available resizing methods, you can effectively adjust images for different purposes while preserving their quality. This guide has provided a comprehensive overview of the process, equipping you with the knowledge and techniques to confidently resize images in FireAlpaca and achieve optimal results.


Closure
Thus, we hope this article has provided valuable insights into Mastering Image Resizing in FireAlpaca: A Comprehensive Guide. We thank you for taking the time to read this article. See you in our next article!